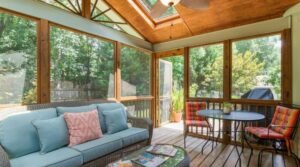
Imagine sipping your morning coffee while surrounded by panoramic views of your backyard, protected from morning dew and insects, yet feeling completely connected to nature. This is the appeal of a three-season room—a versatile home addition that has become increasingly popular among homeowners seeking to expand their living space without the commitment and expense of a full year-round addition.
A three-season room serves as a bridge between your indoor comfort and outdoor beauty, offering a protected sanctuary where you can enjoy nature’s changing seasons from spring through fall. Whether you’re an empty nester looking for a peaceful reading retreat, a family needing flexible entertainment space, or a remote worker seeking an inspiring home office with natural light, a well-designed three-season room can transform how you use and enjoy your home.
However, before breaking ground on this exciting project, there are essential considerations that will determine whether your three-season room becomes your favorite space or a regrettable investment. This comprehensive guide will walk you through every critical aspect—from initial planning and budgeting to design choices and contractor selection—ensuring you make informed decisions that align with your lifestyle, climate, and financial goals.
Understanding Three-Season Rooms: What Makes Them Different?
Defining the Three-Season Room
A three-season room is a semi-conditioned space designed for comfortable use during spring, summer, and fall—typically spanning 8 to 9 months of the year in most climates. Unlike fully insulated four-season sunrooms, three-season rooms feature:
- Lighter insulation or no insulation in walls and ceilings
- Single-pane or screened windows rather than energy-efficient double-pane glass
- Separate or no HVAC system instead of integration with your home’s central heating and cooling
- More affordable construction costs (typically 30-50% less than four-season rooms)
- Faster installation timelines (4-8 weeks versus 10-16 weeks for four-season rooms)
The fundamental difference lies in the level of climate control. While a four-season sunroom maintains comfortable temperatures year-round through full insulation and integrated HVAC, a three-season room acknowledges seasonal limitations in exchange for cost savings and quicker project completion.
Seasonal Use Patterns
Understanding when and how you’ll use your three-season room helps set realistic expectations:
Optimal Use Period:
- Spring (March-May): Gentle temperatures, abundant natural light, perfect for morning routines
- Summer (June-August): Requires cooling solutions but offers extended evening use
- Fall (September-November): Peak enjoyment period with comfortable temperatures and stunning foliage views
Limited Use Period:
- Winter (December-February): Uncomfortable without supplemental heating in most climates; some homeowners report occasional use with space heaters on mild winter days
Key Benefits: Why Homeowners Choose Three-Season Rooms
1. Significant Home Value Increase
Three-season rooms consistently rank among the top home improvements for return on investment. According to remodeling industry data, homeowners can expect to recoup 60-65% of their investment when selling their home, with some markets seeing even higher returns.
Value-Add Factors:
- Increased square footage that appeals to prospective buyers
- Enhanced curb appeal and architectural interest
- Versatile space that buyers can envision using in multiple ways
- Connection to outdoor living, which has become a top priority for modern homebuyers
2. Cost-Effective Living Space Expansion
Compared to traditional home additions, three-season rooms offer dramatic cost savings:
| Addition Type | Average Cost Range | Cost per Square Foot | Insulation Level |
|---|---|---|---|
| Three-Season Room | $15,000 – $35,000 | $80 – $175 | Minimal to none |
| Four-Season Sunroom | $35,000 – $70,000 | $200 – $400 | Full insulation |
| Traditional Room Addition | $45,000 – $150,000 | $250 – $500 | Full insulation |
Note: Costs vary significantly based on location, materials, size, and customization level.
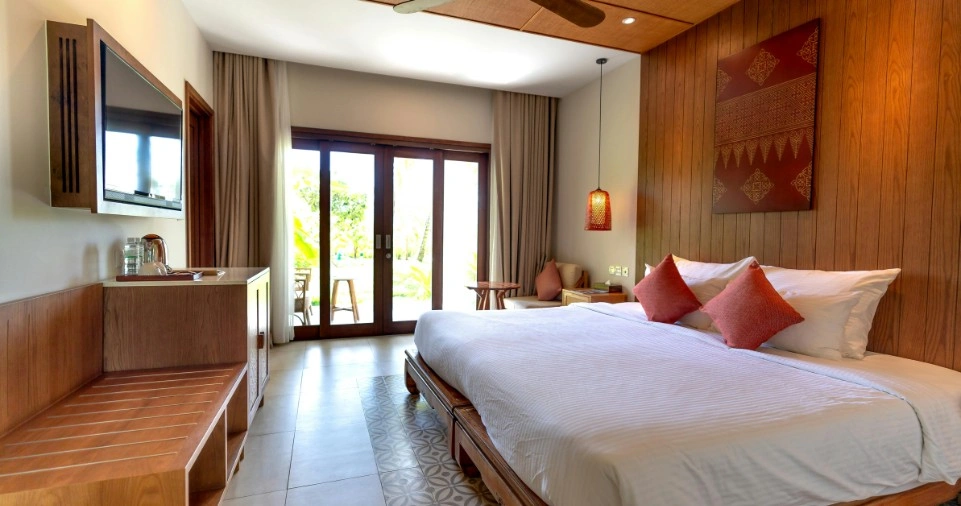
3. Abundant Natural Light and Health Benefits
One of the most compelling reasons homeowners add three-season rooms is the transformative effect of natural light. Large windows that define these spaces deliver remarkable health and wellness benefits:
- Mood Enhancement: Natural light exposure increases serotonin production, reducing symptoms of seasonal affective disorder (SAD) and general mood disturbances
- Improved Sleep Quality: Morning sunlight helps regulate circadian rhythms, leading to better nighttime sleep
- Vitamin D Synthesis: UV exposure through windows supports bone health and immune function
- Reduced Eye Strain: Natural lighting reduces the need for artificial light during daytime hours
- Enhanced Productivity: Studies show natural light improves concentration, creativity, and work performance by 15-25%
4. Versatile Multi-Functional Space
The beauty of a three-season room lies in its adaptability. Homeowners report using these spaces for:
Relaxation and Leisure (78% of users):
- Morning coffee spot with sunrise views
- Reading nook surrounded by natural light
- Meditation or yoga studio with nature connection
- Afternoon napping retreat
Social and Entertainment (65% of users):
- Casual dining for breakfast or light meals
- Game nights with family and friends
- Party overflow space during gatherings
- Comfortable conversation area away from main living spaces
Productive Activities (42% of users):
- Home office with inspiring views
- Craft or hobby workspace with excellent natural lighting
- Children’s play area visible from main house
- Indoor gardening and plant cultivation station
Percentages based on surveys of three-season room owners; many use spaces for multiple purposes.
Critical Planning Considerations Before Construction
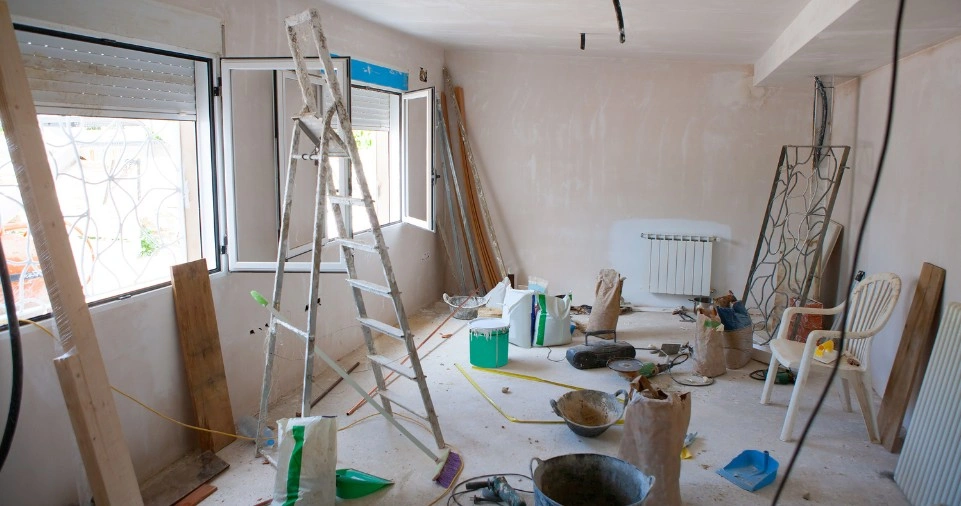
Budget Planning and Hidden Costs
While three-season rooms are more affordable than full additions, comprehensive budget planning prevents unpleasant surprises. Here’s a realistic cost breakdown:
Primary Construction Costs ($15,000 – $35,000):
- Foundation and framing: $5,000 – $10,000
- Windows and doors: $4,000 – $12,000
- Roofing and exterior finish: $3,000 – $7,000
- Flooring installation: $2,000 – $4,000
- Labor and contractor fees: $5,000 – $12,000
Often-Overlooked Additional Expenses:
- Permits and inspections: $500 – $2,000 (varies by municipality)
- Electrical work: $1,500 – $4,000 for outlets, lighting, and potential ceiling fans
- Heating and cooling solutions: $800 – $5,000 depending on chosen system
- Furniture and décor: $2,000 – $8,000 for complete furnishing
- Window treatments: $500 – $2,500 for blinds, shades, or curtains
- Landscaping modifications: $500 – $3,000 to integrate with yard
- Property tax increase: Ongoing annual cost (typically 2-5% of project value)
Budget Protection Strategies:
- Include 15-20% contingency for unexpected issues (foundation problems, material price increases)
- Get 3-5 detailed quotes from licensed contractors for price comparison
- Phase the project if needed—complete structure first, add furnishings gradually
- Prioritize must-haves over nice-to-haves initially; upgrades can come later
Climate Compatibility Assessment
Your local climate significantly impacts three-season room functionality and enjoyment. Use this decision framework:
Ideal Climates for Three-Season Rooms:
- Mild year-round regions (Southern California, Florida, Gulf Coast): 10-12 months of comfortable use
- Four distinct seasons (Northeast, Midwest, Pacific Northwest): 7-9 months of prime use
- Moderate winters (Mid-Atlantic, Southern states): 8-10 months with occasional winter use
Climate-Specific Considerations:
| Climate Type | Key Challenge | Recommended Solutions |
|---|---|---|
| Hot & Humid | Excessive heat gain, moisture | Low-E glass, ceiling fans, dehumidifier, UV-blocking treatments |
| Cold Winters | Freezing temperatures limit use | Supplemental heating, insulated floor, weatherstripping, storm windows |
| High Wind Areas | Structural integrity concerns | Reinforced framing, impact-resistant glass, secure roof attachment |
| Heavy Snow Regions | Roof load and ice dams | Pitched roof design, structural reinforcement, proper drainage |
| High Sun Exposure | Glare and UV damage | Retractable awnings, UV-filtering glass, strategic orientation |
Orientation and Sun Exposure Strategy
The direction your three-season room faces dramatically affects its comfort and usability:
South-Facing (Most Popular):
- ✅ Advantages: Maximum winter sun for passive heating, bright throughout day, longest daily light
- ❌ Challenges: Potential summer overheating, more cooling costs, furniture fading from UV
- Best for: Those who prioritize year-round light and don’t mind managing summer heat
East-Facing (Morning Lovers):
- ✅ Advantages: Gorgeous sunrise views, pleasant morning light, naturally cooler afternoons
- ❌ Challenges: Limited afternoon light, shadowy in evening
- Best for: Morning coffee enthusiasts, breakfast rooms, home offices with afternoon work elsewhere
West-Facing (Evening Enjoyment):
- ✅ Advantages: Spectacular sunsets, warm evening light, cooler mornings
- ❌ Challenges: Intense afternoon heat in summer, potential glare
- Best for: Entertainment spaces, evening relaxation, sunset watchers
North-Facing (Steady Light):
- ✅ Advantages: Consistent indirect light, minimal heat gain, reduced cooling needs
- ❌ Challenges: Cooler temperatures, no direct sun, may feel dim in winter
- Best for: Art studios, reading rooms, climates with intense summer sun
Pro Tip: If possible, design your three-season room with windows on multiple sides to capture light throughout the day and create cross-ventilation for natural cooling.
Permits, Codes, and Legal Requirements
Navigating the regulatory landscape prevents costly delays and potential legal issues:
When Permits Are Required: Most jurisdictions require building permits for three-season rooms when:
- Adding new foundation or modifying existing structure
- Increasing home’s footprint beyond existing dimensions
- Running new electrical or plumbing lines
- Exceeding 120 square feet (threshold varies by location)
Typical Permit Process Timeline:
- Initial consultation: 1-2 weeks to gather requirements
- Plan development: 2-4 weeks for architect or designer to create drawings
- Permit submission: 1-2 weeks for municipal review
- Approval and revision: 2-6 weeks depending on complexity and municipality
- Final approval: Ready to start construction
Total Permit Timeline: 6-14 weeks (plan accordingly in your project schedule)
Code Compliance Considerations:
- Setback requirements: Minimum distance from property lines (typically 5-20 feet)
- Height restrictions: Maximum structure height in residential zones
- Lot coverage limits: Maximum percentage of property that can be built upon
- HOA approvals: Homeowners associations often have additional design requirements
- Energy codes: Some jurisdictions have minimum insulation requirements even for three-season rooms
Critical Questions for Your Contractor:
- “Will you handle all permit applications, or is that my responsibility?”
- “Are permits included in your quoted price, or are they additional?”
- “What happens if the permit is denied or requires modifications?”
- “How will you ensure all work meets local building codes?”
Design and Construction Elements
Window and Door Selection Guide
Windows are the defining feature of three-season rooms, accounting for 40-60% of wall space. Making the right choice affects comfort, energy efficiency, and long-term satisfaction.
Window Type Comparison:
| Window Type | Insulation Value | Cost Range | Best Use Case | Lifespan |
|---|---|---|---|---|
| Single-Pane Glass | Minimal (R-1) | $150-300 per window | Budget-conscious, mild climates | 15-20 years |
| Screen Panels | None (airflow) | $50-150 per panel | Maximum ventilation, bug-free | 10-15 years |
| Eze-Breeze Vinyl | Moderate (R-2 to R-3) | $300-500 per panel | Versatile, easy operation | 20-25 years |
| Double-Pane Glass | Better (R-3 to R-4) | $400-700 per window | Extended season use | 20-30 years |
| Low-E Coated Glass | Best (R-4 to R-5) | $500-900 per window | Maximum comfort, energy savings | 25-30 years |
Specialized Window Features Worth Considering:
- Retractable screens: Allow conversion from screened to glass panels ($200-400 per window)
- Tinted glass: Reduces glare and UV penetration by 50-70% ($50-100 per window upcharge)
- Tempered glass: Safety glass for areas with children or pets ($75-150 per window additional)
- Automated operation: Motorized opening for hard-to-reach windows ($300-600 per window)
Door Selection Priorities:
- Sliding glass doors: Space-efficient, provides wide opening, excellent for deck integration ($800-2,500)
- French doors: Elegant appearance, traditional aesthetic, requires swing clearance ($1,200-3,500)
- Single entry door: Most economical, works for smaller spaces ($500-1,500)
Flooring Options That Withstand Temperature Fluctuations
Three-season rooms experience greater temperature swings than climate-controlled spaces, making flooring selection critical:
Top Flooring Choices:
1. Luxury Vinyl Plank (LVP) – Most Popular
- Cost: $3-8 per square foot installed
- Advantages: Waterproof, temperature-stable, wood appearance, easy maintenance
- Considerations: Quality varies widely; invest in 5mm+ thickness for durability
- Best for: Those wanting wood aesthetics with maximum durability
2. Porcelain or Ceramic Tile – Most Durable
- Cost: $5-15 per square foot installed
- Advantages: Extremely durable, moisture-resistant, retains cool temperature in summer
- Considerations: Can feel cold underfoot, hard surface, professional installation required
- Best for: Humid climates, integration with outdoor patios
3. Sealed Concrete – Modern & Low-Maintenance
- Cost: $3-12 per square foot (depending on finish)
- Advantages: Ultra-durable, thermal mass benefits, unique industrial aesthetic
- Considerations: Can crack with foundation settling, requires professional sealing
- Best for: Contemporary designs, those seeking minimal maintenance
4. Engineered Hardwood – Premium Option
- Cost: $6-14 per square foot installed
- Advantages: Beautiful natural appearance, more stable than solid wood
- Considerations: More expensive, requires climate monitoring, not suitable for humid regions
- Best for: Moderate climates with controlled humidity
Flooring to Avoid:
- ❌ Carpet: Traps moisture, harbors allergens, degrades in temperature swings
- ❌ Solid hardwood: Expands/contracts excessively without climate control
- ❌ Laminate: Susceptible to moisture damage, delamination in humidity
Heating and Cooling Solutions
Effective climate control extends the usability of your three-season room and enhances comfort during shoulder seasons.
Heating Options Comparison:
Electric Fireplace ($500-2,500)
- Heat Output: 4,000-5,000 BTU (heats 400-500 sq ft)
- Installation: Simple plug-in or hardwired
- Pros: Ambiance, zone heating, no venting required, safe operation
- Cons: Higher operating costs ($50-100/month), supplemental only
- Best for: Smaller rooms, aesthetic appeal priority
Ductless Mini-Split System ($2,000-5,000)
- Heat Output: 9,000-24,000 BTU (highly adjustable)
- Installation: Professional required, outdoor compressor needed
- Pros: Highly efficient, provides both heating and cooling, programmable
- Cons: Higher upfront cost, visible wall unit, regular maintenance needed
- Best for: Those wanting year-round comfort, energy-conscious homeowners
Radiant Floor Heating ($8-15 per sq ft)
- Heat Output: Even, consistent warmth throughout space
- Installation: Must be installed during initial construction
- Pros: Ultimate comfort, invisible, energy-efficient, silent operation
- Cons: Expensive installation, difficult to retrofit, slow temperature adjustment
- Best for: New construction, luxury installations, tile floors
Space Heaters ($50-300)
- Heat Output: 1,500-5,000 BTU (portable)
- Installation: None required
- Pros: Inexpensive, portable, immediate heat
- Cons: Safety concerns, inefficient, must be monitored, limited range
- Best for: Occasional use, supplemental heating only
Cooling Strategies:
- Ceiling Fans ($150-500 each): Most cost-effective, creates air movement, reduces perceived temperature by 4-8°F
- Portable AC Units ($300-700): Flexible placement, no installation, moderate efficiency
- Ductless Mini-Split ($2,000-5,000): Most efficient, permanent solution, handles both heating and cooling
- Natural Ventilation: Strategic window placement, cross-breeze design, zero operating cost
Energy-Efficient Cooling Tips:
- Install UV-blocking window films (reduces heat gain by 50-70%)
- Use reflective roof panels to deflect solar radiation
- Plant deciduous trees on south/west sides for summer shade, winter sun
- Deploy retractable awnings for adjustable sun control
- Schedule ventilation during cooler morning/evening hours
Lighting Design for Multi-Season Use
Thoughtful lighting extends your three-season room’s usability into evening hours and creates ambiance:
Layered Lighting Approach:
1. Ambient Lighting (Overall Illumination)
- Recessed ceiling lights: Clean appearance, even distribution, dimmable ($75-150 per fixture)
- Ceiling fan with integrated light: Dual function, space-saving ($200-600)
- Pendant lights: Statement pieces, focused illumination ($150-800 each)
2. Task Lighting (Functional Areas)
- Reading lamps: Floor or table lamps near seating ($50-300)
- Under-shelf lighting: Illuminates work surfaces ($30-100 per strip)
- Wall sconces: Space-efficient, targeted light ($75-300 per pair)
3. Accent Lighting (Atmosphere)
- String lights: Whimsical, affordable ambiance ($20-100)
- Landscape uplighting: Highlights views beyond windows ($50-200 per fixture)
- LED strip lighting: Under-seating or architectural details ($25-150 per strip)
Smart Lighting Integration: Modern three-season rooms benefit from programmable lighting:
- Dimmer switches: Adjust brightness for time of day and activity ($30-100 per switch)
- Smart bulbs: Control via smartphone, programmable schedules ($15-50 per bulb)
- Motion sensors: Automatic activation for evening entry ($25-75 per sensor)
- Dawn/dusk sensors: Automatically adjust to natural light levels ($40-120)
Material Selection for Longevity and Performance

Weather-Resistant Building Materials
Roofing Materials:
| Material | Lifespan | Cost per Sq Ft | Weather Resistance | Maintenance |
|---|---|---|---|---|
| Asphalt Shingles | 15-30 years | $3-5 | Good | Moderate |
| Metal Roofing | 40-70 years | $7-14 | Excellent | Minimal |
| Polycarbonate Panels | 10-20 years | $4-8 | Good (UV-coated) | Low |
| Glass Roof Panels | 25-40 years | $15-40 | Excellent | Moderate |
Exterior Trim and Siding:
- Composite materials: Rot-resistant, minimal maintenance, 25-30 year lifespan ($4-8/linear foot)
- Vinyl trim: Affordable, never needs painting, prone to cracking in extreme cold ($2-4/linear foot)
- Cedar or redwood: Beautiful natural appearance, requires regular sealing, 20-25 years ($6-12/linear foot)
- PVC trim: Superior moisture resistance, paintable, excellent durability ($5-9/linear foot)
Foundation Options:
- Concrete slab: Most economical, permanent, excellent for tile/vinyl flooring ($4-7 per sq ft)
- Deck-style foundation: Elevated, allows drainage, works with existing deck ($8-15 per sq ft)
- Crawlspace foundation: Provides storage, better insulation, higher cost ($12-20 per sq ft)
Moisture Management Systems
Preventing moisture intrusion protects your investment and ensures longevity:
Essential Moisture Control Features:
- Proper drainage: Slope foundation away from house at 2% grade minimum
- Gutters and downspouts: Direct roof runoff 6-10 feet from foundation
- Vapor barriers: Install under flooring and behind walls in humid climates
- Ventilation: Include operable windows on at least two walls for cross-ventilation
- Dehumidifier option: Consider for humid climates or enclosed spaces
Condensation Prevention:
- Insulated glass windows: Reduces interior temperature differential
- Air circulation: Ceiling fans prevent stagnant, humid air
- Proper sealing: Weatherstripping and caulking eliminate moisture entry points
Furnishing and Interior Design Strategies
Multi-Purpose Furniture Selection
Three-season rooms often serve multiple functions, making furniture selection strategic:
Smart Furniture Choices:
Seating Options ($500-3,000 total):
- Modular sectional: Reconfigurable for different activities, typically seats 4-6
- Daybeds or chaise lounges: Napping-friendly, space-efficient
- Outdoor-rated furniture: Withstands temperature/humidity fluctuations
- Storage ottomans: Dual-purpose seating and blanket storage
Dining/Work Surfaces ($300-1,500):
- Bistro or café table: Compact dining for 2-4 people
- Folding table: Expandable for entertaining, stores flat
- Console table: Multipurpose work surface, display area
- Height-adjustable desk: Converts from dining to standing work surface
Storage Solutions ($200-1,000):
- Built-in benches with storage: Maximizes space, custom to room dimensions
- Shelving units: Display plants, books, décor items
- Closed cabinets: Protects items from temperature extremes
- Outdoor-rated storage bins: Seasonal decoration rotation
Material Considerations for Furniture:
- Wicker or rattan: Classic sunroom aesthetic, naturally weather-resistant
- Metal frames: Durable, modern appearance, powder-coated for rust resistance
- Teak or eucalyptus wood: Naturally weather-resistant hardwoods
- All-weather wicker: Synthetic option that mimics natural wicker, superior durability
- Outdoor-rated fabrics: Solution-dyed acrylics resist fading, mildew, moisture (Sunbrella, Outdura brands)
Nature-Inspired Design Themes
Connecting your three-season room to its outdoor surroundings creates a cohesive experience:
Color Palette Strategies:
- Earth tones: Browns, tans, terracotta echo natural landscapes
- Botanical greens: Sage, moss, forest green bring outdoor feeling inside
- Sky blues: Creates serene, open atmosphere
- Neutral base with accent colors: Allows seasonal décor rotation
Texture Layering:
- Natural fiber rugs: Jute, sisal, seagrass add organic texture ($100-500)
- Woven textiles: Basket-weave pillows, macramé wall hangings
- Stone or wood accents: Side tables, decorative objects
- Live plants: Spider plants, ferns, succulents thrive in sunroom conditions
Bringing the Outdoors In:
- Large potted plants: Create living wall, improve air quality
- Nature-themed artwork: Botanical prints, landscape photography
- Natural materials: Driftwood, river stones as decorative elements
- Bird feeders visible from windows: Adds movement and life to views
Common Mistakes to Avoid
Learning from others’ experiences prevents costly errors:
1. Underestimating Heating and Cooling Needs
The Mistake: Assuming natural ventilation alone will suffice for year-round comfort.
The Reality: Without proper climate control:
- Summer temperatures can reach 95-105°F in sunrooms with afternoon sun exposure
- Even mild winter days may only reach 45-50°F inside without heating
- Usage drops to less than 20% of potential when uncomfortable
The Solution:
- Budget 10-15% of total project cost for heating/cooling solutions
- Install during construction rather than retrofitting (saves 30-40%)
- Consider dual-purpose systems like ductless mini-splits that both heat and cool
- Plan electrical capacity for future climate control additions
2. Choosing Low-Quality Materials to Save Money
The Mistake: Selecting cheapest options for windows, flooring, or structural elements.
The Reality: Poor-quality materials lead to:
- Window seal failures within 3-5 years (condensation, drafts)
- Flooring deterioration from temperature cycling
- Structural issues requiring costly repairs ($5,000-15,000)
- Diminished home value when selling
The Solution:
- Invest in mid-to-high quality windows (20+ year lifespan justifies cost)
- Choose proven flooring materials designed for temperature fluctuation
- Verify contractor uses quality framing lumber and weatherproofing
- Request warranties on all major components (minimum 10 years)
3. Inadequate Contractor Vetting
The Mistake: Hiring based solely on lowest bid without thorough research.
The Reality: Unqualified contractors create:
- Permit violations requiring expensive corrections
- Structural deficiencies compromising safety
- Incomplete projects when contractor abandons job
- No warranty support when issues arise
The Solution: Essential Contractor Verification Steps:
- ✅ Verify active license with state contractor licensing board
- ✅ Confirm insurance (general liability $1M minimum, workers compensation)
- ✅ Check references from 3-5 recent similar projects
- ✅ Review portfolio of completed three-season rooms
- ✅ Read online reviews across multiple platforms (Google, Yelp, Angi)
- ✅ Get detailed written contracts specifying materials, timeline, payment schedule
- ✅ Verify permit handling and who is responsible for applications
- ✅ Understand warranty coverage for both labor and materials
4. Ignoring Home’s Architectural Style
The Mistake: Adding a three-season room that clashes with existing home design.
The Reality:
- Reduces curb appeal and property value
- Creates dated appearance that future buyers dislike
- Stands out awkwardly rather than looking like intentional addition
The Solution:
- Match roofline pitch to existing home architecture
- Use complementary materials for siding and trim
- Align window styles with home’s existing windows
- Consider professional design consultation ($500-2,000 well spent)
5. Poor Orientation Planning
The Mistake: Placing three-season room without considering sun exposure and views.
The Reality:
- West-facing rooms become uncomfortably hot in summer afternoons
- North-facing spaces feel cold and dim even in summer
- Rooms facing unattractive views (neighbor’s wall, garbage area) go unused
The Solution:
- Assess sun patterns throughout day and different seasons
- Prioritize pleasant views over convenience of placement
- Consider hybrid approach with windows on multiple walls
- Use landscaping to enhance views and provide shade
Project Timeline and What to Expect

Understanding the construction timeline helps you plan around disruption:
Typical Three-Season Room Project Timeline:
| Phase | Duration | Key Activities | Homeowner Involvement |
|---|---|---|---|
| Planning & Design | 2-4 weeks | Meetings with contractor, material selection, design finalization | High – frequent decisions |
| Permits & Approvals | 3-8 weeks | Permit applications, HOA reviews, plan revisions | Low – mostly waiting |
| Site Preparation | 2-5 days | Demolition, ground leveling, utility marking | Medium – access needed |
| Foundation | 1-2 weeks | Concrete pouring, curing time, drainage installation | Low – stay clear of area |
| Framing & Roofing | 1-2 weeks | Wall framing, roof installation, structural completion | Medium – site visits |
| Windows & Doors | 3-5 days | Installation, sealing, weatherproofing | Low – brief walkthroughs |
| Electrical & HVAC | 3-7 days | Wiring, fixture installation, climate system setup | Medium – placement decisions |
| Flooring | 2-5 days | Subfloor, flooring installation, trim | Low – stay off surface |
| Finishing Touches | 3-7 days | Paint, trim, final details, cleanup | High – final inspections |
| Final Inspection | 1-2 days | Municipal inspection, punch list completion | High – final approval |
Total Duration: 6-12 weeks (highly variable based on weather, permit delays, material availability)
Seasonal Timing Considerations:
- Best time to start: Late spring or early fall for moderate weather during construction
- Avoid if possible: Mid-summer (extreme heat) or winter (frozen ground, weather delays)
- Plan around holidays: Add 1-2 weeks if construction spans major holidays
Three-Season Room vs. Four-Season Sunroom: Making the Right Choice
Many homeowners struggle to decide between these two options. Here’s a comprehensive comparison:
Decision-Making Framework:
Choose a Three-Season Room If:
- ✅ You live in a mild climate with short, moderate winters
- ✅ Your budget is $15,000-35,000 for the project
- ✅ You primarily want spring through fall enjoyment
- ✅ You’re comfortable with seasonal limitations
- ✅ You prefer quicker project completion (6-8 weeks)
- ✅ You want to minimize ongoing heating/cooling costs
- ✅ Your local climate has mild winter temperatures above 40°F
Choose a Four-Season Sunroom If:
- ✅ You experience harsh winters with temperatures regularly below freezing
- ✅ Your budget allows $35,000-70,000 investment
- ✅ You want year-round daily use of the space
- ✅ You’re willing to pay higher energy costs for climate control
- ✅ You need a true room addition that functions like rest of home
- ✅ You plan to use space as home office, nursery, or essential living area
- ✅ You’re seeking maximum ROI at resale (four-season rooms return 70-85%)
Hybrid Options: Some homeowners opt for “convertible” designs that can be upgraded:
- Start with three-season construction with reinforced framing
- Install electrical/HVAC roughing during initial build
- Upgrade to four-season in future by adding insulation and climate control
- Cost premium: 10-15% more initially, but saves 40-50% versus complete rebuild
Maximizing Your Investment: Pro Tips from Industry Experts
Future-Proofing Your Three-Season Room
1. Pre-wire for Future Upgrades Even if you’re not adding climate control initially, have your contractor install:
- Electrical conduit to future HVAC locations ($200-500)
- Additional electrical circuits for future needs ($300-800)
- Ceiling fan mounting boxes even if not installing fans immediately ($50-100 each)
2. Design for Potential Conversion If you might want to upgrade to four-season later:
- Use studded walls instead of post-and-beam (easier to insulate)
- Specify higher-grade windows that meet four-season standards
- Reinforce foundation to support additional wall weight
- Cost now: +$2,000-4,000 | Savings later: $8,000-15,000
3. Install Quality From the Start Components worth spending extra on:
- Windows: Quality windows last 25-30 years vs. 10-15 for cheap options
- Flooring: Mid-grade luxury vinyl ($5-6/sq ft) outlasts budget options by 10+ years
- Roofing: Metal roofing ($10-12/sq ft) lasts 40-50 years vs. 15-20 for basic shingles
Enhancing Comfort and Usability
Smart Additions Worth Considering:
Ceiling Fans ($200-600 each):
- Reduce cooling costs by 30-40% in summer
- Improve comfort without AC
- Reverse in winter to circulate warm air
- ROI: Pays for itself in 2-3 seasons through energy savings
Automated Window Shades ($300-800 per window):
- Programmable sun control
- Reduces heat gain by 60-70%
- Protects furniture from UV damage
- Smart home integration
Built-in Storage ($1,000-3,000):
- Maximizes usable space
- Reduces clutter
- Adds $2,000-4,000 to home value
- Custom-fitted to room dimensions
Outdoor Lighting Integration ($500-2,000):
- Landscape lighting visible from room
- Extends evening ambiance
- Increases security
- Creates seamless indoor-outdoor connection
Seasonal Maintenance Checklist
Protect your investment with regular maintenance:
Spring Preparation (March-April):
- ✅ Inspect window seals and weatherstripping
- ✅ Clean all glass surfaces inside and out
- ✅ Check for winter damage to roof or structure
- ✅ Test heating/cooling systems
- ✅ Power wash flooring if applicable
Summer Maintenance (June-July):
- ✅ Clean or replace AC filters monthly
- ✅ Inspect screens for tears or damage
- ✅ Trim vegetation near structure
- ✅ Check for pest intrusion
- ✅ Monitor for condensation issues
Fall Preparation (September-October):
- ✅ Clean gutters and downspouts
- ✅ Inspect and repair any weatherproofing
- ✅ Store summer furniture if needed
- ✅ Test supplemental heating systems
- ✅ Apply weatherstripping if worn
Winter Checks (December-January):
- ✅ Monitor for ice dam formation on roof
- ✅ Check for air leaks around doors/windows
- ✅ Protect plants from freezing
- ✅ Reduce humidity levels if condensation appears
- ✅ Inspect structural integrity after storms
Real-World Examples: Three-Season Rooms That Deliver
Case Study 1: The Morning Coffee Retreat
Location: Charlotte, North Carolina
Size: 180 square feet
Cost: $22,000
Orientation: East-facing
Design Features:
- Eze-Breeze vinyl windows on three walls
- Luxury vinyl plank flooring (wood-look)
- Ceiling fan with integrated lighting
- Bistro table and comfortable seating for four
- Electrical outlets for coffee station
Owner Feedback: “We use this space every single morning from March through November. The east orientation gives us perfect sunrise views and keeps it cool enough for afternoon naps. We’ve even used it on mild January days with a space heater. Best $22,000 we’ve ever spent on the house.”
Case Study 2: The Multi-Generational Entertainment Hub
Location: New Hampshire
Size: 320 square feet
Cost: $35,000
Orientation: South-facing with west windows
Design Features:
- Double-pane low-E glass windows
- Porcelain tile flooring
- Ductless mini-split for heating and cooling
- Built-in storage benches
- Integrated outdoor deck access
- Recessed lighting with dimmers
Owner Feedback: “With aging parents living with us, we needed a space where everyone could gather without feeling cramped in the main house. The three-season room solved this perfectly. We use it 9-10 months per year, and the ductless system means we can even enjoy it on mild winter days. Our teenage kids treat it like their hangout space, and we’ve hosted countless family game nights here.”
Case Study 3: The Home Office Oasis
Location: Pacific Northwest
Size: 200 square feet
Cost: $28,500
Orientation: North-facing
Design Features:
- Floor-to-ceiling windows with UV-blocking film
- Engineered hardwood flooring
- Dedicated electrical circuits for office equipment
- Built-in desk and shelving
- Task lighting and ambient lighting layers
- Insulated glass for year-round comfort
Owner Feedback: “Working from home required a dedicated space, but we didn’t want to sacrifice a bedroom. The three-season room gave us the natural light that keeps me energized throughout the day, and the north orientation prevents screen glare. I’m out here working 11 months of the year, and it’s transformed my work-from-home experience.”
FAQs
A: A three-season room is an enclosed space with large windows that can be used comfortably during spring, summer, and fall but typically lacks the insulation and heating for winter use. It bridges the gap between a screened porch and a fully heated sunroom.
Q: How much does a three-season room typically cost?
A: Costs range from $10,000 to $40,000 depending on size, materials, and features. A basic 12×12 room averages $15,000-$25,000, while larger or custom designs can exceed $50,000.
Q: Do I need a building permit?
A: Yes, most municipalities require permits for three-season room additions. Check local zoning laws, setback requirements, and homeowner association rules before starting construction.
Q: What’s the difference between a three-season room and a four-season room?
A: Three-season rooms lack full insulation and climate control, making them unsuitable for extreme temperatures. Four-season rooms are fully insulated, heated, and cooled for year-round use.
Q: Will a three-season room increase my home’s value?
A: Typically yes, with an ROI of 50-80%. However, returns vary by location, quality of construction, and local market demand. In warmer climates, they’re more valuable.
Q: What’s the best foundation for a three-season room?
A: Options include concrete slab (most durable), existing deck conversion (cost-effective), or pier foundation (for sloped yards). Your choice depends on terrain, budget, and local building codes.
Q: How long does construction take?
A: Most three-season rooms take 2-6 weeks to complete, depending on size and complexity. Custom designs or weather delays can extend the timeline to 8-12 weeks.
Q: Can I heat or cool a three-season room?
A: Portable heaters and fans work for mild temperature control, but most three-season rooms aren’t designed for HVAC systems. For year-round comfort, consider upgrading to a four-season room.
Q: How do I maintain a three-season room?
A: Clean windows and screens regularly, inspect weatherstripping annually, check for water damage or leaks, and winterize by removing furniture and covering if needed.
Q: Can I add a three-season room to any home?
A: Most homes can accommodate one, but factors like existing foundation, roof structure, and yard space matter. A structural engineer can assess feasibility for your specific property.
Q: What utilities should I plan for?
A: At minimum, include electrical outlets (GFCI-protected) and lighting. Some homeowners add ceiling fans, outdoor speakers, or dedicated circuits for appliances.
Q: When’s the best time of year to build?
A: Late spring through early fall offers ideal construction conditions. Starting in spring allows completion before peak summer enjoyment, while avoiding winter weather delays.
Conclusion: Creating Your Perfect Three-Season Sanctuary
Adding a three-season room to your home represents more than just additional square footage—it’s an investment in your daily quality of life, connection to nature, and property value. When thoughtfully planned and professionally executed, this versatile space becomes the heart of your home during the most beautiful months of the year.
Key Takeaways:
- Budget Realistically: Plan for $15,000-35,000 including hidden costs, with 15-20% contingency for unexpected expenses.
- Prioritize Quality: Invest in durable windows, weather-resistant materials, and experienced contractors—cheap shortcuts lead to expensive repairs.
- Plan Climate Control: Even if not installing initially, design and wire for future heating/cooling to extend usability.
- Consider Orientation: South or east-facing rooms offer the best natural light and temperature profiles for most climates.
- Navigate Permits Properly: Work with contractors who understand local building codes and handle permit processes professionally.
- Design for Multiple Uses: Flexible furniture and thoughtful layouts accommodate evolving needs over years of ownership.
- Maintain Regularly: Simple seasonal maintenance protects your investment and ensures decades of enjoyment.
Is a Three-Season Room Right for You?
If you answered “yes” to most of these questions, a three-season room is likely an excellent investment:
- Do you love spending time outdoors but want protection from bugs and weather?
- Is your climate comfortable for 7-10 months per year?
- Do you need additional living space without the cost of a full addition?
- Would you benefit from a space flooded with natural light?
- Are you looking for a home improvement with strong ROI potential?
Ready to Begin Your Three-Season Room Journey?
Your Next Steps:
- Define Your Vision: Create a Pinterest board or collection of images showing your ideal three-season room style and features.
- Assess Your Budget: Determine your comfortable investment range, including contingency funds for unexpected costs.
- Research Contractors: Request consultations from 3-5 licensed contractors specializing in sunrooms and three-season additions.
- Obtain Multiple Quotes: Compare detailed proposals including materials, timeline, warranty coverage, and payment schedules.
- Plan Your Timeline: Consider seasonal factors and how construction timing aligns with your schedule and local weather.
- Secure Financing: If needed, explore home equity loans, personal loans, or contractor financing options before committing.
Don’t let another season pass without enjoying the outdoor connection you deserve. A professionally designed and constructed three-season room will provide countless hours of relaxation, entertainment, and daily joy for years to come.
Start your three-season room planning today, and transform those underutilized outdoor views into your favorite space in the home. Your morning coffee, afternoon reading sessions, and evening gatherings with loved ones await in your future three-season sanctuary.